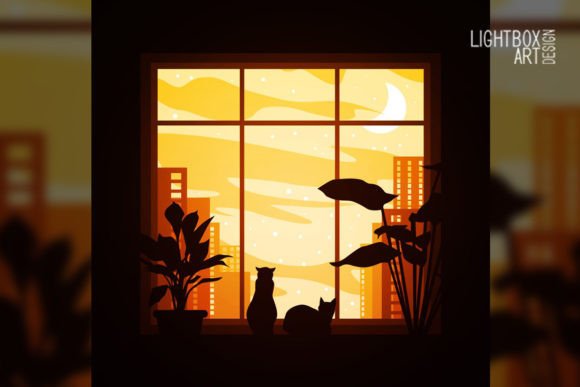
Window Lightbox: Crafting Professional Depth with Layered Paper Art
A Window Lightbox transforms flat paper into a luminous, three-dimensional scene that captures attention through depth and shadow. Unlike standard papercraft, this specific art form relies on backlighting to reveal intricate details hidden within stacked layers. For creators, educators, and small business owners looking to produce unique decor or personalized gifts, understanding the technical nuances of this medium is essential. The appeal lies in the interplay between opacity and light, but achieving a professional result requires more than just cutting out shapes; it demands precision in material selection, file management, and assembly.
Many enthusiasts dive into digital downloads without fully grasping how the components interact. When executed correctly, a Window Lightbox serves as a stunning focal point for retail displays, home interiors, or educational storytelling tools. However, overlooking specific technical requirements often leads to disappointing results where shadows appear muddy, colors look washed out, or structural integrity fails. By addressing common pitfalls early, you can ensure your project translates beautifully from screen to physical object.
Navigating Digital File Formats Correctly
One of the most frequent errors occurs during the initial download and preparation phase. A comprehensive digital package typically includes a ZIP file containing SVG, JPG, PDF, DXF, CDR, AI files, and a Tutorial Instruction.txt. Beginners often default to opening the JPG file because it provides an immediate visual preview, but using raster images for cutting results in pixelated edges and sizing inaccuracies. The JPG is strictly for reference.
For laser cutters or plotting machines, always utilize the vector-based SVG, DXF, or AI files. These formats maintain mathematical precision regardless of scaling. If you are hand-cutting, the PDF template serves as your most reliable guide due to its fixed dimensions. Overlooking the included Tutorial Instruction.txt is another missed opportunity; this document often contains layer-specific assembly notes that aren't obvious from the design files alone. Ignoring these instructions can lead to reversed layers or incorrect spacing, fundamentally altering the intended lighting effect.
The Critical Importance of Paper Weight and Opacity
Material choice dictates the success of any backlit paper art. A pervasive mistake is using standard office paper or cardstock lighter than 200 gsm. Thin paper allows too much light to bleed through the surface rather than defining the edges, resulting in a glowing white rectangle rather than a detailed image. Conversely, paper heavier than 250 gsm can block light entirely, making inner details invisible and creating harsh, unintended silhouettes.
The 200–250 gsm range is the industry standard for Window Lightbox projects because it offers the perfect balance of translucency and rigidity. This weight holds crisp cuts while allowing sufficient diffusion for the RGB LED strip to create soft gradients. Additionally, verify that your paper is acid-free if the piece is intended for long-term display or sale. Acidic papers yellow over time when exposed to heat from lighting elements, degrading the artwork's value and aesthetic quality.
Precision in Layer Spacing and Dimensions
This specific template features 9 layers of design files, with each layer measuring exactly 8×8 inches (21×21 cm). A common misconception is that all nine layers should be stacked directly against one another. Without separation, you lose the "window" effect entirely. The depth is created by negative space between the paper sheets. Failing to account for spacers reduces the piece to a flat collage.
You must use foam board or specialized spacers between each of the nine layers to maintain consistent gaps. This separation allows light to travel laterally, illuminating the edges of the cutouts. When planning your build, calculate the total depth required. Nine layers plus eight spacer gaps will require a shadow box frame significantly deeper than a standard photo frame. Measure your foam board thickness carefully; even a 1mm variance per layer accumulates to nearly a centimeter of difference across the entire stack, potentially causing fitment issues within the housing.
Lighting Selection and Heat Management
Illumination is where many functional failures occur. Using incandescent bulbs or non-dimmable lights generates excessive heat, which poses a fire risk and warps paper layers over time. Always opt for an RGB LED strip with a dedicated power supply. LEDs run cool and provide the color versatility necessary to change the mood of the Window Lightbox without physical alterations.
Placement matters as much as the light source itself. Mounting the LED strip directly behind the bottom layer creates hotspots—bright patches that distract from the art. Instead, position the strip along the interior perimeter of the shadow box or use a diffuser sheet between the LEDs and the first paper layer. This ensures even illumination across the entire 21×21 cm area. Also, ensure your power supply matches the voltage and amperage requirements of your specific LED strip to prevent flickering or premature burnout.
Cutting Techniques and Structural Integrity
Whether you use an art knife or a cutting machine, blade maintenance is non-negotiable. Dull blades tear paper fibers rather than slicing them, leaving fuzzy edges that catch light unevenly. In a backlit environment, every imperfection is magnified. Change your blade frequently, especially when working through nine layers of dense cardstock. If using a laser cutter, perform test cuts on scrap paper of the same weight to calibrate speed and power settings. Scorch marks from improper laser settings cannot be hidden once the light is turned on.
Structural stability is another practical concern. Adhesive selection plays a vital role here. Liquid glues introduce moisture that causes paper to buckle or ripple. Use double-sided tape, glue dots, or spray adhesive designed for paper crafts to keep layers flat. Apply adhesive only to the outer margins or designated tab areas to avoid blocking light paths in the central image area. Taking the time to align each 8×8 inch layer precisely prevents the "stair-step" effect where misaligned layers look sloppy when illuminated.
Evaluating Quality Before Final Assembly
Rushing to glue everything together permanently is a costly error. Always conduct a dry fit and a test lighting session before final adhesion. Stack your cut layers with temporary spacers and place them in front of your intended light source. Check for alignment issues, unwanted light leaks around the edges, and areas where the paper might be too thick or too thin for the desired effect.
This evaluation stage allows you to trim excess material, adjust spacer thickness, or reposition lighting elements without ruining the final piece. For entrepreneurs selling these items, this quality control step ensures consistency across multiple units. For hobbyists, it provides a chance to refine technique. Remember that a Window Lightbox is an additive process; correcting mistakes becomes exponentially harder with each permanent layer added. Patience during the assessment phase saves both materials and frustration.
Creating a successful Window Lightbox combines artistic vision with technical discipline. By respecting the specifications of the digital files, adhering to proper paper weights, maintaining precise layer spacing, and managing lighting safely, you elevate your work from a simple craft project to a professional-grade illuminated display. Attention to these practical details ensures that the final piece communicates the intended beauty and functions reliably for years to come.