Tooth Fairy Gift Box Template: 3D Curved Design
Creating a memorable experience for a child losing their first tooth often comes down to the smallest details. A digital template for a 3D curved tooth fairy box transforms a simple monetary exchange into a tangible keepsake that feels magical. Unlike standard envelopes or generic containers, this specific Tooth Fairy Gift Box Template offers a professional, polished aesthetic that elevates the tradition. It is designed as a printable, cuttable file compatible with crafting machines like Cricut, allowing parents, educators, and small business owners to produce custom packaging that looks store-bought but carries personal sentiment.
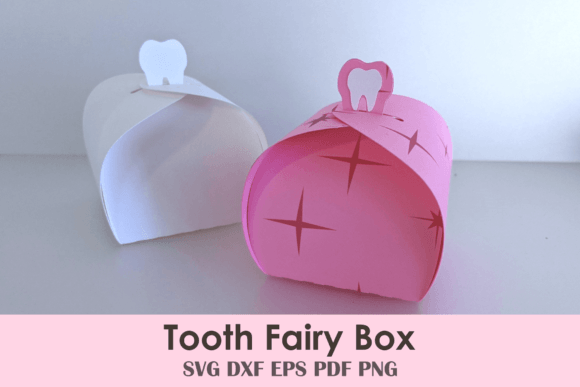
The primary appeal of this digital design lies in its structural integrity and ease of assembly. The box features a unique curved silhouette that distinguishes it from flat, square alternatives. When assembled using the default settings on US letter paper, it yields a sturdy container with a two-inch square base. This size is intentionally practical; it is compact enough to fit under a pillow yet spacious enough to hold folded bills, coins, small jewelry, or handwritten notes. For those needing to accommodate larger gifts, the vector-based nature of the file means it scales up seamlessly within design software without losing resolution or structural proportion.
Versatile Applications Beyond the Bedroom
While the name suggests a singular use case, this template serves multiple audiences effectively. For parents and guardians, it solves the problem of how to present a gift in a way that feels special rather than transactional. The tactile experience of opening a structured box adds weight to the moment, reinforcing the fantasy and excitement of childhood milestones.
Dental professionals and pediatric offices also find immense value in this resource. Patient retention and positive associations with dental visits are critical for practice growth. Using these boxes as part of a "goodie bag" or post-procedure reward system creates a lasting positive memory. Instead of handing out loose stickers or plastic trinkets that may be discarded, a branded or themed tooth box serves as a functional takeaway that reinforces oral health education in a fun, non-clinical way. Educators and homeschoolers can similarly utilize the template for classroom celebrations or craft projects, teaching children about geometry, folding, and fine motor skills through a relevant, engaging activity.
For entrepreneurs and crafters selling on platforms like Etsy or at local markets, this digital template represents a low-overhead product opportunity. Because the design requires no glue for assembly, it can be sold either as a digital download for DIY customers or as pre-assembled physical units. The ability to customize colors, papers, and added embellishments allows sellers to create niche variations for different holidays, themes, or age groups without needing to engineer new structural files from scratch.
Assembly Options for Every Skill Level
One of the most significant barriers to entry for paper crafting is the fear of complex construction. This Tooth Fairy Gift Box Template addresses that anxiety through intelligent engineering. The design utilizes a tab-and-slot locking mechanism, eliminating the need for adhesives during the main assembly phase. This not only speeds up production time for bulk orders but also makes the project accessible to beginners who may lack precision gluing skills. The result is a clean, seamless finish where structural integrity comes from the fold and tuck rather than sticky residue.
The template acknowledges that not every crafter owns specialized scoring tools. To ensure inclusivity, the digital file package includes two distinct versions of the fold lines. Users with a scoring wheel or stylus can utilize the dedicated score layer for crisp, professional bends. However, if you do not have a scoring tool, there is absolutely no problem. The alternative file set replaces score lines with perforated fold guides. These perforations weaken the paper fiber just enough to allow for a straight, clean fold by hand, ensuring that the final curved shape maintains its intended form regardless of your equipment list.
Navigating Cricut Design Space Setup
For users utilizing Cricut Design Space, proper layer management is essential for a successful cut. When the file is loaded, you will typically see two distinct layers. Understanding how to manipulate these ensures the machine performs exactly as intended.
- Layer Identification: Upon upload, identify the top layer containing the fold lines and the bottom layer containing the cut lines.
- Operation Settings: Select the top layer and change the operation type to "Score." Leave the bottom layer set to "Cut." This tells the machine to use the scoring tool (or perforation blade) first before switching to the fine-point blade for cutting.
- Attachment: This step is frequently overlooked but vital. You must attach all layers together before hitting "Make It." Attaching locks the score lines to the cut lines in their correct spatial relationship. Without this, the machine may cut all score lines on one mat and all cut lines on another, rendering the pieces unusable.
- Tool Adaptation: If you are opting for the perforated fold version because you lack a scoring tool, simply delete the score line layer entirely. The perforations are integrated into the cut path or provided as a separate cut-only layer depending on the specific file variation included.
Critical Considerations Before Creating
Before committing to a print run or purchasing materials, there are several practical factors to evaluate to ensure the best outcome. Paper weight is perhaps the most important variable. While standard copy paper can work for prototypes, it often lacks the rigidity required to maintain the 3D curve over time. Cardstock ranging from 65lb to 80lb is generally the sweet spot. It provides enough body for the tabs to lock securely while remaining pliable enough to fold without cracking. Heavier weights may require deeper scoring or risk breaking fibers along the fold line.
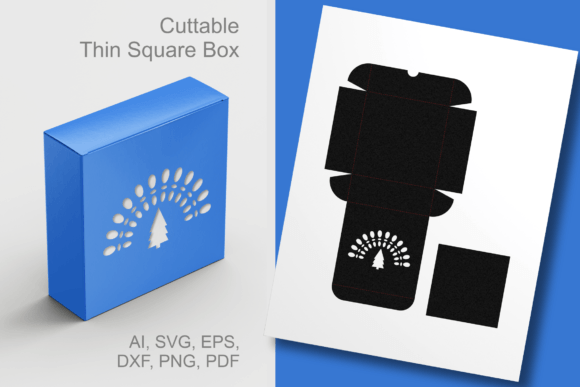
Customization potential should also be factored into your planning. The template includes a separate tooth shape file, which is shown glued onto the box in sample images. This decorative element is optional and can be swapped for other shapes, names, or logos. If you plan to add this embellishment, consider whether you want to apply it before or after assembly. Applying it flat before folding is usually easier and results in better adhesion, but you must ensure it does not interfere with the slot mechanisms.
Finally, consider the end-user experience when scaling the design. While the file scales up easily for larger items, remember that increasing the size also increases the surface area and potentially the weight of the contents. If you scale the box significantly beyond the default two-inch base, verify that your chosen paper weight is sufficient to support the larger structure. A massive box made from thin paper may sag or lose its curved definition. Testing a single prototype at your desired scale is always recommended before mass production, especially for commercial applications where consistency is key to brand reputation.
This Tooth Fairy Gift Box Template bridges the gap between digital convenience and physical craftsmanship. Whether used to delight a single child, enhance a dental practice's patient experience, or build a product line for a creative business, it offers a reliable, scalable foundation. By understanding the assembly options, software setup, and material considerations, users can maximize the value of this digital asset and create finished products that truly stand out.